


Introduction
What is the graph protocol all about?
"The Graph is a decentralized protocol for indexing and querying blockchain data." - The Graph
In this article, I will give a detailed guide on building and deploying a subgraph. To be specific, we will be building and deploying a subgraph for the crowd NFT collection. We will create, test and deploy on the Graph's studio to the Ethereum main network. This article is suitable for everybody, regardless of their technical knowledge and background.
However, before we begin, I would like us to familiarize ourselves with some keywords and concepts that would be used in this tutorial.
Subgraphs are custom-made open APIs that are used to efficiently organize blockchain data to make searching, retrieving, and querying the blockchain data using GraphQL, incomparably easy so that the apps don't have to go through all the data on the blockchain and be filtered to get the particular data that is to be indexed on the blockchain.
Since subgraphs are open APIs, every developer can build their decentralized applications (dApps) on The Graph by integrating subgraphs into their applications. Currently, "Over 17K developers have built applications on The Graph, including the teams behind Uniswap, Synthetix, Gnosis, Balancer, Enzyme, Livepeer, DAOstack, Decentraland, and many others." - The Graph.
The Graph's Subgraph studio is a development environment where subgraph developers create, test, and query their subgraphs. They are either published on The Graph's hosted service or the Ethereum main network.
This article was inspired by Mardeni's course on subgraph development. However, unlike in the aforementioned course, I will be deploying an NFT instead of a token. Hence, there will be slight differences in my approach.
Without further ado, we proceed to build the subgraph for crowd NFT or any NFT of your choice.
Creating the Subgraph
Head over to The Graph's page,
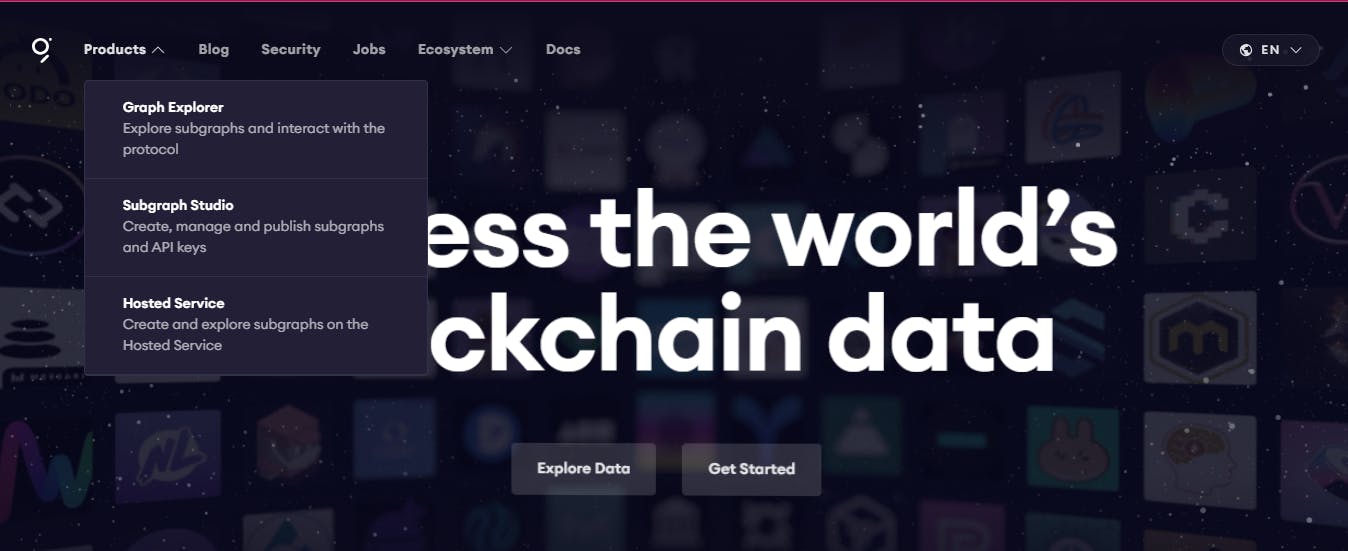
select Subgraph Studio, connect your wallet, and click the create subgraph button.
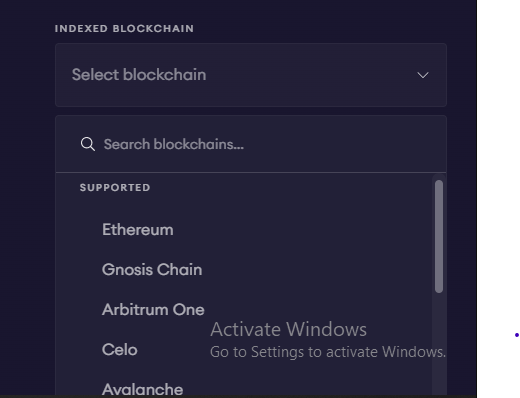
Go to Open Sea's website, and choose any NFT of your choice. I'll be using Crowd's NFT. Then, back to creating the subgraph, we'd fill out the name of our NFT as the subgraph name and select Ethereum as our indexed blockchain like so:
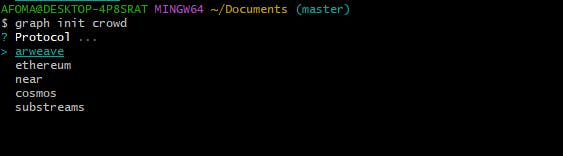
We'd go to our terminal and run the graph init (subgraph name) command, mine will be graph init crowd, select Ethereum from the list of protocols displayed there,
then select Subgraph Studio

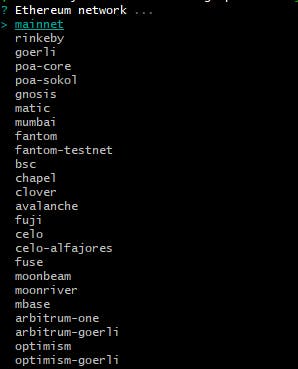
The name of your subgraph will be auto-filled out for you, so I'd be seeing 'crowd', and click enter. Select mainnet
Go to Crowd's Etherscan, copy the contract address, paste it into your terminal, and use the default contract name (Contract).
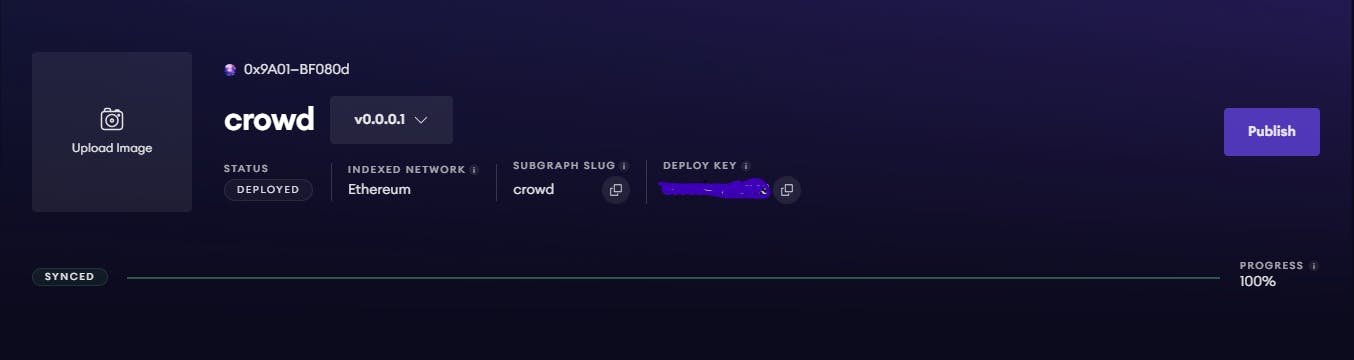
We just successfully created our subgraph!
Editing files
Creating our subgraph auto-generates a boilerplate template code for us. So we'd have to edit certain files.
Subgraph. yaml
Head over to the subgraph.yaml, erase the auto-generated code there and paste this one:
specVersion: 0.0.5
schema:
  file: ./schema.graphql
dataSources:
  - kind: ethereum
    name: Contract
    network: mainnet
    source:
      address: "0xaA7200ee500dE2dcde75E996De83CBD73BCa9705"
      abi: Contract
      startBlock: 16650266
    mapping:
      kind: ethereum/events
      apiVersion: 0.0.7
      language: wasm/assemblyscript
      entities:
        - Transfer
      abis:
        - name: Contract
          file: Contract\abis\Contract.json
      eventHandlers:
        - event: Transfer(indexed address,indexed address,indexed uint256)
          handler: handleTransfer
      file: Contract\Contract.wasm
From our subgraph.yaml file, we can see a skeletal overview of our subgraph, like the language in which it is built with- web assembly, and the entries we made in our terminal when initializing our subgraph, like the version of our subgraph, the file path of our schema, the network to which it is deployed, the contract address, and name of the contract. If your start block is not pre-filled for you, kindly go to this site to find it.
By default, we have several events in our subgraph. However, we are going to remove all of them except the transfer event.
Schema.graphql
Our application will be querying the content of the schema, therefore, we will be defining the entities in our schema to align with the requirements of our subgraph. Replace the auto-generated code in the schema.graphql file and replace it with this one instead:
type TransferEvent @entity {
  id: ID!

  " Quantity of tokens transferred "
  amount: BigDecimal!

  " Transaction sender address "
  sender: Bytes!

  " Address of destination account "
  destination: Bytes!

  " Block number "
  block: BigInt!

  " Event timestamp "
  timestamp: BigInt!

  " Transaction hash "
  transaction: Bytes!
}
The above code block is from The Graph Academy course 2021
The corresponding values to the keys in the schema indicate the types. For example, in this schema, id has a type of id, the sender has a type of Bytes, and so on. The timestamp is measured in seconds or milliseconds, and it represents the time at which the transaction became a part of the blockchain, the amount indicates the tokens being sent or received in the transaction, the destination key represents the receiver's address, block represents the particular block to which the transaction was added.
contract.ts
Replace the auto-generated code in your src/contract.ts with this one:
import { Transfer } from "../generated/Contract/Contract"
import { TransferEvent } from "../generated/schema"

  export function handleTransfer(event: Transfer): void {
    let transferEvent = new TransferEvent(
If we were indexing a token, we would have used only the transaction's hash to successfully form a unique id like this:
event.transaction.hash.toHexString()
Bear in mind this advice below given to us from The Graph's course on subgraph development:
If you are building a subgraph to index NFTs, then do not use the hash of the transaction as the id alone. This is because it is not possible to transfer multiple NFTs (a bundle) in one transaction.
Hence, since we are indexing an NFT, we would concatenate the transaction's hash with the event number to form a unique id as we did below
 event.transaction.hash.toHexString() + "-"
      + event.transactionLogIndex.toString()
      )
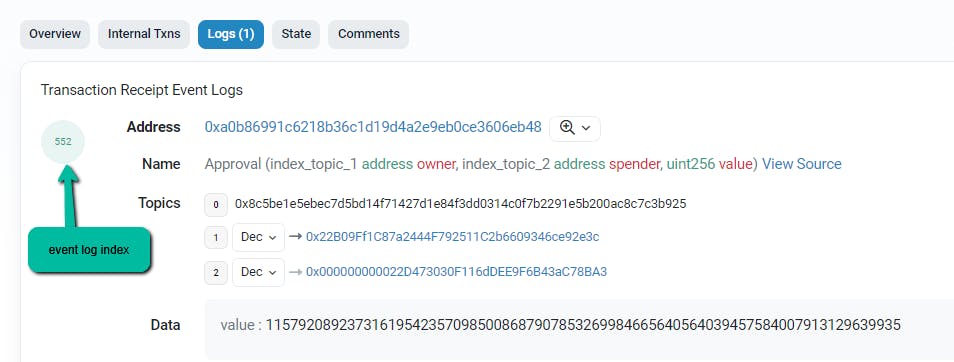
In each transaction, there is something called the event logs. Events are emitted in a sequence defined by the log index. So in Block X, Transaction A has Events 1,2,3 and Transaction B will then contain Events 4,5,6 (assuming both transactions have 3 events emitted). So in each of these transactions, there are 3 events. But the combination of
transaction A - event 2gives you a unique identifier.Here's an example showing that this Approval event was the 552nd event emitted in this block: https://etherscan.io/tx/0x87ff9288dc249dffd08dca242c2ad331160b013be7c9b0c3c581c24c500d333c#eventlog
- So if you're storing the
transferevent. You should useevent.transaction.hash.toHexString() + "-" + event.transactionLogIndex.toString()as the event, otherwise the 2nd transfer in the transaction will overwrite the 1st transfer.- Derek (Data Nexus)
Here is the entire code of the contract.ts:
import { Transfer } from "../generated/Contract/Contract"
import { TransferEvent } from "../generated/schema"

  export function handleTransfer(event: Transfer): void {
    let transferEvent = new TransferEvent(
        event.transaction.hash.toHexString() + "-"
        + event.transactionLogIndex.toString()
        )
    let amount = (event.params.tokenId.toBigDecimal())
    transferEvent.amount = amount
    transferEvent.sender = event.params.from
    transferEvent.destination = event.params.to
    transferEvent.block = event.block.number
    transferEvent.timestamp = event.block.timestamp
    transferEvent.transaction = event.transaction.hash

  transferEvent.save()
  }
Deploying the subgraph
Go to the terminal and run this command
graph auth --studio <deploy-key>
Enter the name of the NFT when you are asked which product you want to initialize, then copy the deploy key from your subgraph in the studio, enter it into the terminal, and run this command
graph deploy --studio <name of subgraph>
You can go along with the version that was suggested for you on the terminal or use the latest version of The Graph at the time you'd be building your subgraph.
Likely to occur error and resolution
Path error
If after editing your contract.ts you have a persistent path error like this,

especially when you are sure the path of your files is correct, then run the yarn codegen command to ensure type safety.
Conclusion
Subgraphs make organizing and filling blockchain data according to their indexes quite easy so that developers can easily query specific data from the blockchain without having to go through all the data there.
From what we have been able to do so far, the subgraph.yaml file provides us with an outline of the fundamental components of our subgraph.
Our application will be querying the content of the schema.
Since our subgraph indexed NFTS, and not tokens, we had to concatenate the transaction's hash with the event number to form a unique id.
Certain errors do not necessarily mean that you made mistakes in your code. After going through your code and seeing nothing wrong with your code, run the yarn codegen to correct that error.
Finally, keep in mind that you do not have to be a coding expert to build this subgraph. Just follow through with the instructions and you are good to go.
Connect with me
I would love to see the subgraphs you would build from following the guide in this article. Please tag me on my Twitter handle or LinkedIn to show me what you built.
Here is the GitHub repository of my subgraph. Feel free to leave a star. Have a nice day.